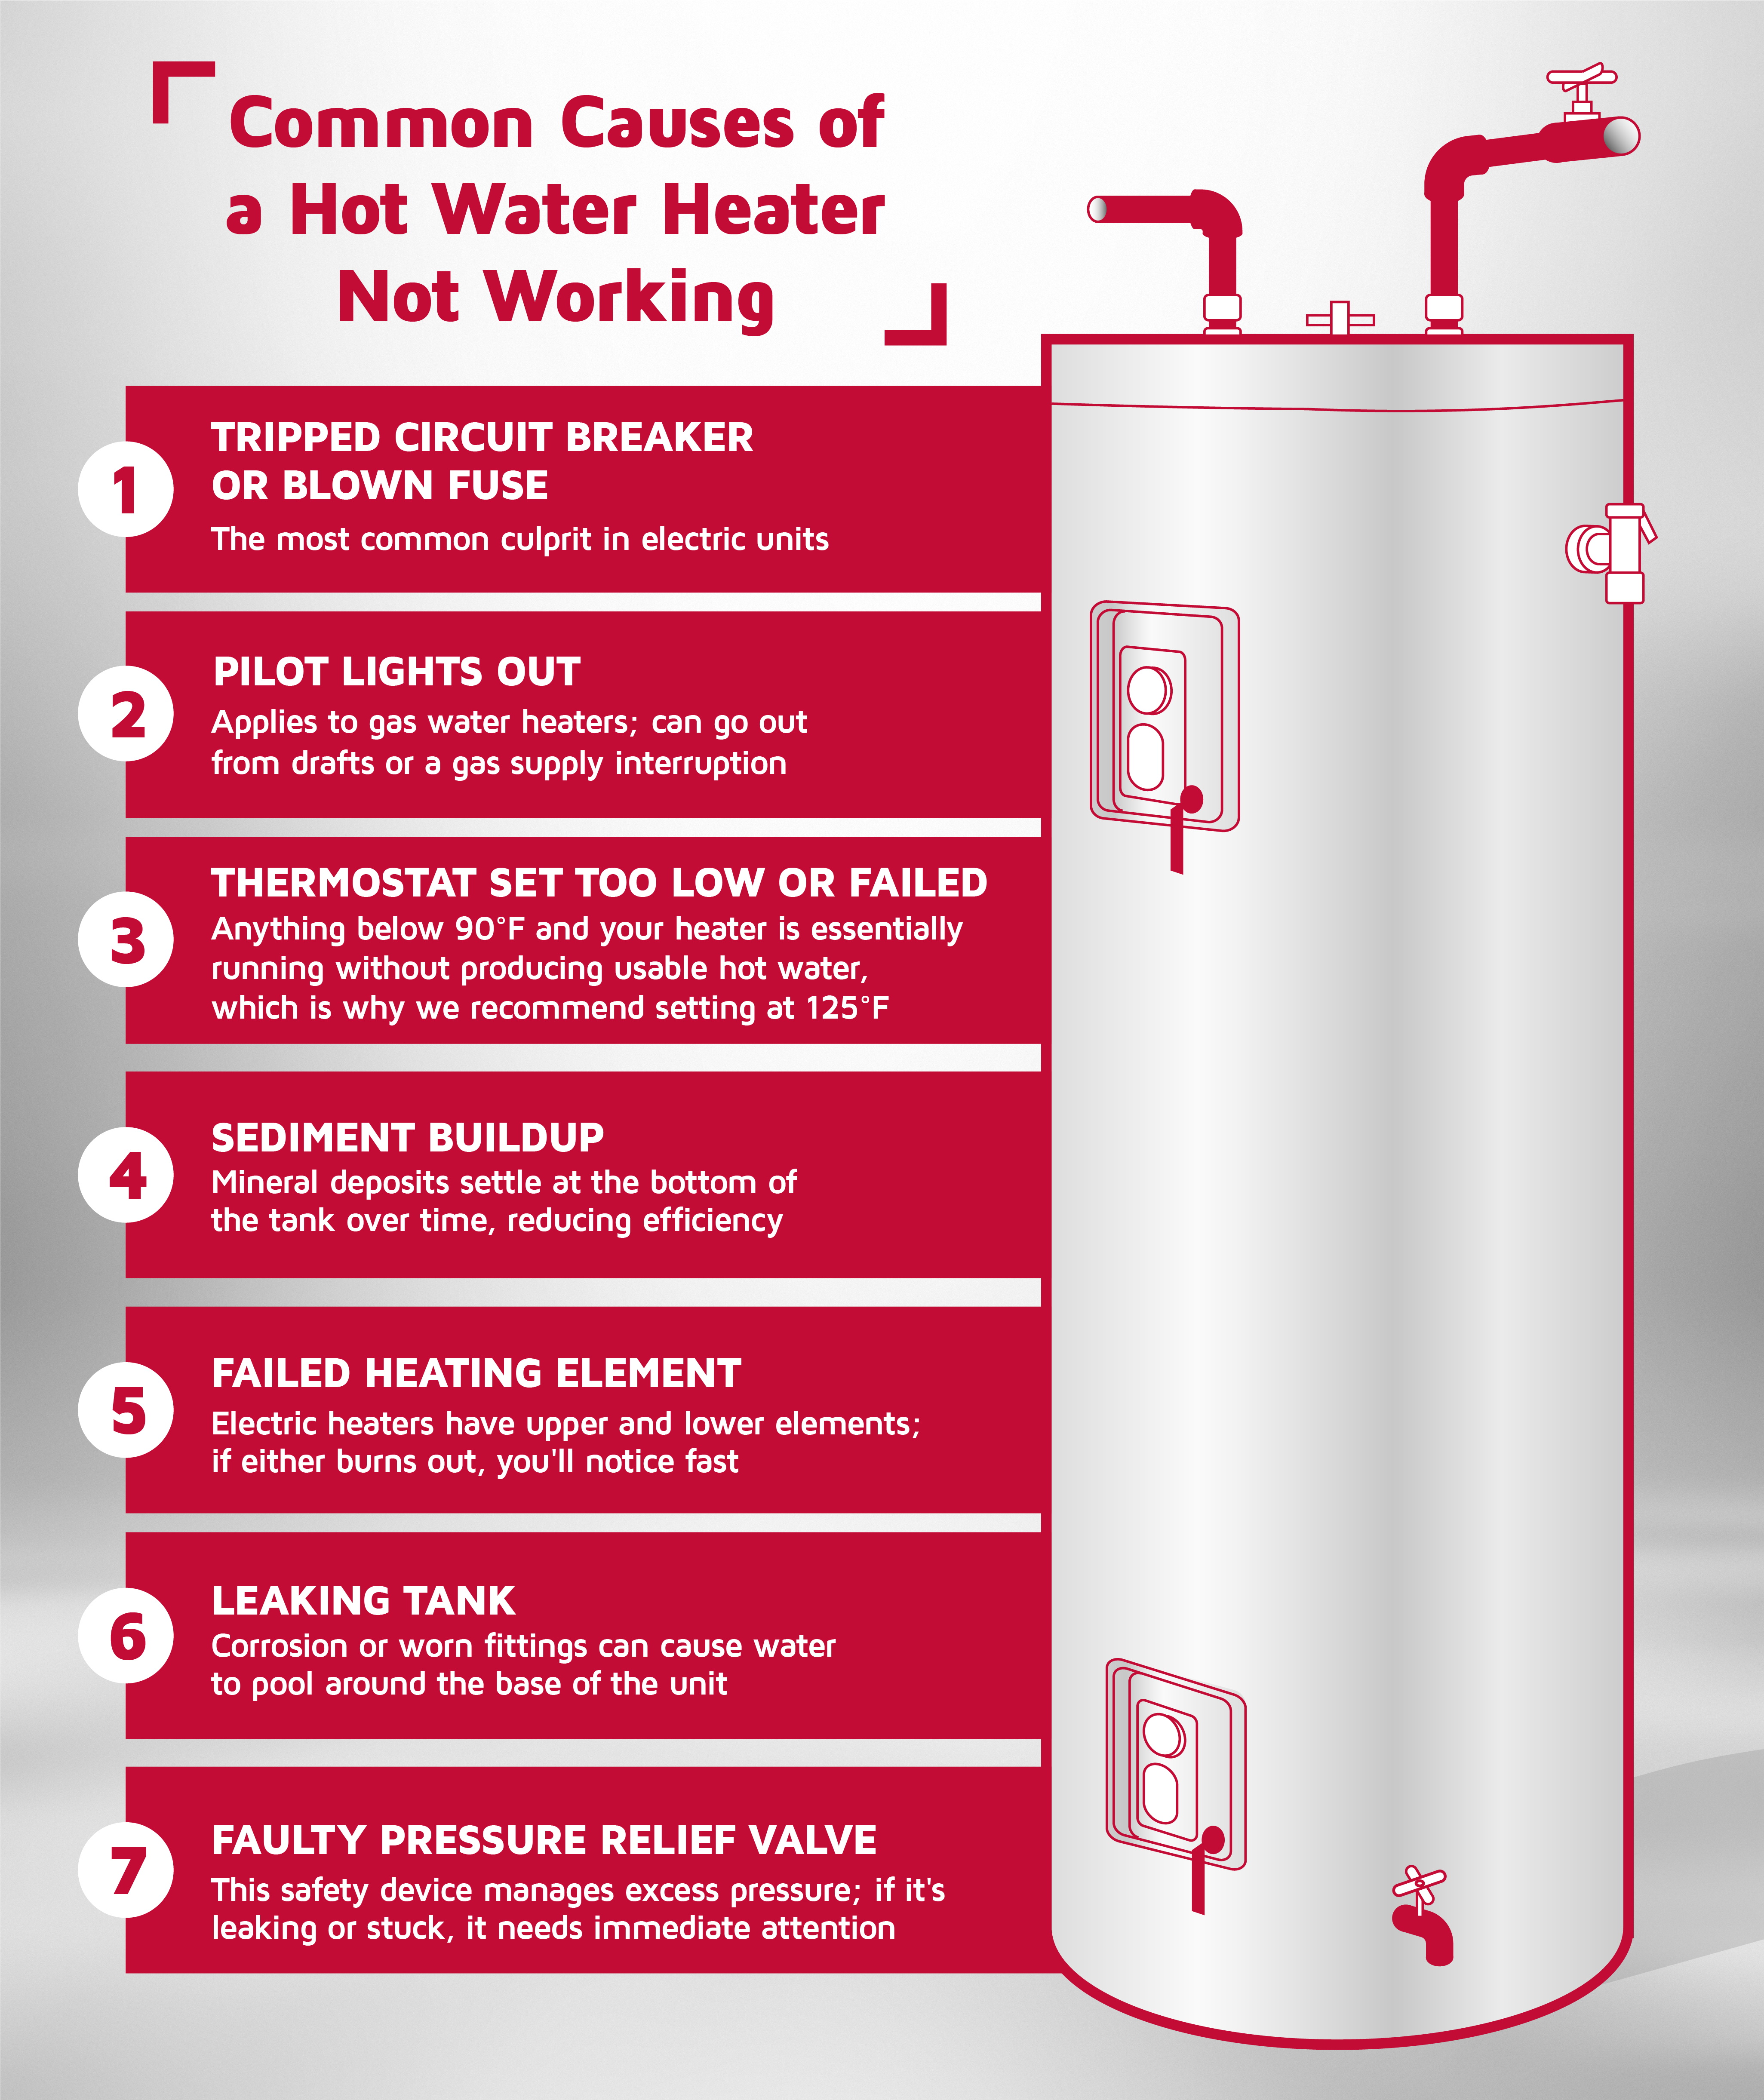
Common Causes of a Hot Water Heater Not Working
Before you troubleshoot, it helps to know what you're dealing with. Most water heater failures trace back to a short list of familiar causes. Here's what's most likely going on:
- Tripped circuit breaker or blown fuse: the most common culprit in electric units
- Pilot light out: applies to gas water heaters; can go out from drafts or a gas supply interruption
- Thermostat set too low or failed: anything below 90°F and your water heater is essentially running without producing usable hot water, which is why we recommend setting at 125°F
- Sediment buildup: mineral deposits settle at the bottom of the tank over time, reducing efficiency
- Failed heating element: electric heaters have upper and lower elements; if either burns out, you'll notice fast
- Leaking tank: corrosion or worn fittings can cause water to pool around the base of the unit
- Faulty pressure relief valve: this safety device manages excess pressure; if it's leaking or stuck, it needs immediate attention
Knowing the likely cause helps you troubleshoot smarter and know when to step back and call a professional.
Safety First: What to Do Before You Start
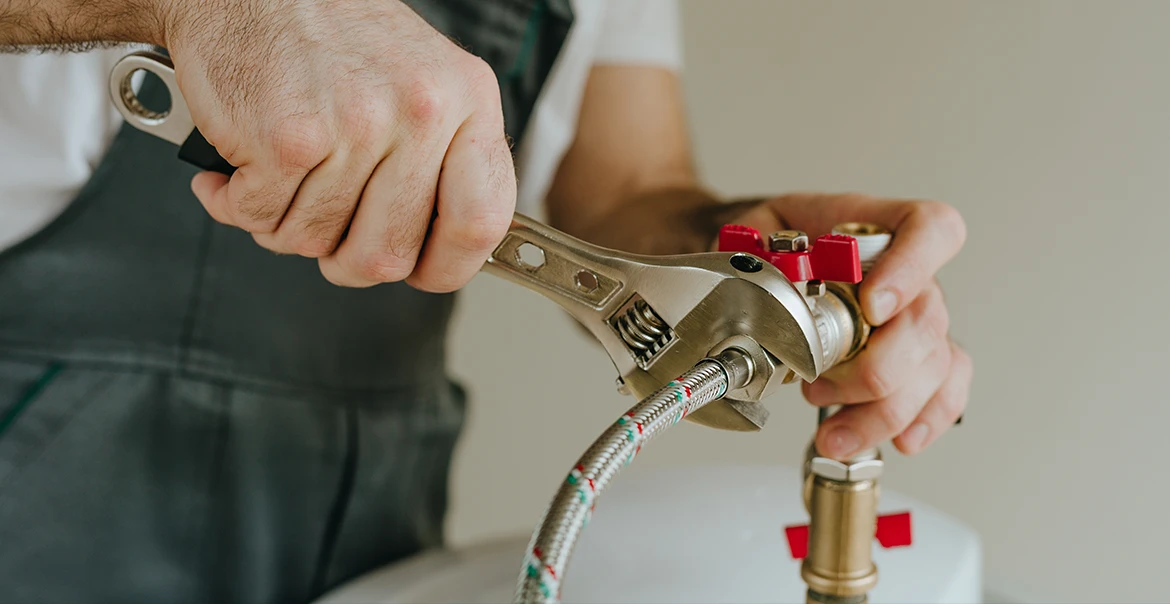
Before you touch anything on your water heater, take these precautions:
- Electric units: Turn off the power at the circuit breaker labeled "water heater" before opening any panels or touching components.
- Gas units: Turn the gas valve to the "pilot" or "off" position before inspecting the unit.
- If you smell gas at any point, stop everything. Leave the house immediately and call your gas company before doing anything else. Do not flip switches, use your phone inside, or re-enter the home until it's been cleared.
These steps take less than a minute and make every step that follows safer.
Quick Troubleshooting Steps and What to Look For
Once you've confirmed it's safe to proceed, work through these checks in order:
- Step 1: Check the Power Supply
Head to your home's electrical panel and look for the breaker labeled "water heater." If it's sitting in the middle position, not fully on, not fully off, it's tripped. Flip it completely off, then firmly back on to reset it. If it trips again right away, stop. That's a sign of a deeper electrical issue that needs a licensed technician.
Tools needed: None. What to look for: A breaker in the middle or "off" position.
- Step 2: Relight the Pilot Light (Gas Units Only)
If you have a gas water heater, check whether the pilot light is on. Look for the small viewing window near the base of the unit; you should see a small, steady blue flame. If it's out, follow the relighting instructions printed directly on your water heater. Most units walk you through it step by step.
If the pilot won't stay lit after two or three attempts, the thermocouple, a small sensor that signals the gas valve that the pilot is on, likely needs replacing. That's a job for a technician.
- Step 3: Check the Thermostat and Reset Button
Your water heater's thermostat should be set between 125°F and 140°F. Too low and you won't get enough hot water. Too high and you risk scalding. Adjust the dial if it's been bumped or changed.
Electric water heaters also have a red reset button on the upper thermostat, sometimes called the high-limit switch. Press it firmly until you feel or hear a click. If it won't stay engaged or keeps tripping, there's an underlying issue that needs professional diagnosis.
Tools needed: Flathead screwdriver to access the thermostat panel. Safety note: Power must be off at the breaker before opening the panel.
- Step 4: Inspect the Pressure Relief Valve
The pressure relief valve, also called the T&P valve, is a safety device that releases pressure if the tank overheats. It's typically located on the side of the tank with a small lever and a discharge pipe running toward the floor. If it's dripping or hissing, it may be stuck open or failing.
Safety Note: Never cap or plug a pressure relief valve. If it's leaking, call a licensed technician to replace it. A faulty T&P valve is a serious safety risk that should never be ignored or deferred.
- Step 5: Flush Sediment from the Tank
Hear rumbling or popping sounds from your water heater? That's sediment, which are mineral deposits that accumulate at the bottom of the tank over time. It reduces efficiency and shortens your unit's lifespan. Flushing the tank can help.
Here's how to do it:
- Turn off the power or gas to the unit
- Connect a garden hose to the drain valve at the base of the tank
- Run the water into a bucket or floor drain until it flows clear
- Close the drain valve, disconnect the hose, and restore power or gas
Tools needed: Garden hose, bucket, or access to a floor drain.
When to Call a Professional?
Some water heater problems go beyond what's safe or practical to fix on your own, and knowing when to step back is just as important as knowing what to check. Call a licensed technician when:
- You smell gas anywhere near the unit
- There's a persistent or pooling leak around the base of the tank
- You've completed all basic checks and still have no hot water
- The reset button keeps tripping after you engage it
- Your unit is 8-12+ years old and showing repeated or worsening issues
A Lennox-certified technician can run a full diagnostic, test electrical components, check gas pressure, and help you decide whether a repair or a full replacement makes more financial sense. Water heaters typically last 8-12 years. If yours is aging and repairs are stacking up, a newer, more energy-efficient unit could save you real money over time, and deliver the kind of consistent comfort your household depends on every day.
Simple Maintenance Tips to Prevent Future Water Heater Problems
The best water heater problem is the one that never happens. A little routine care goes a long way toward keeping your unit running reliably year after year:
- Schedule an annual inspection: A licensed technician will catch small issues before they become expensive ones
- Drain and flush the tank once a year: Twice in hard-water areas, to prevent sediment buildup from reducing efficiency
- Check the anode rod every 2-3 years: This metal rod prevents tank corrosion from the inside; replace it when it's heavily worn
- Keep the area around the unit clear: Make sure vents aren’t blocked and that no combustible materials are near a gas heater
- Watch for early warning signs: Discolored water, unusual noises, or a sudden spike in energy bills all signal it's time to take a closer look
Staying ahead of maintenance means fewer surprises and more mornings that start exactly the way they should.
Get Your Hot Water Back
A water heater that isn't working is stressful, but it doesn't have to stay that way. Start with the basics: check the power, relight the pilot light, reset the thermostat, and inspect the pressure relief valve. Handle what you safely can. And when the problem goes deeper than a quick fix, trust a Lennox-certified professional to get it right the first time.
Your comfort matters. Your family's well-being matters. And you deserve a home where the hot water just works, every single time you need it. Ready to get your hot water back? Explore our water heater products today.
We’re here to help make home comfort solutions a little clearer and a lot less stressful.
No Worries. It’s a Lennox.™
